
To read the beginning of the saga, please see the first installment.
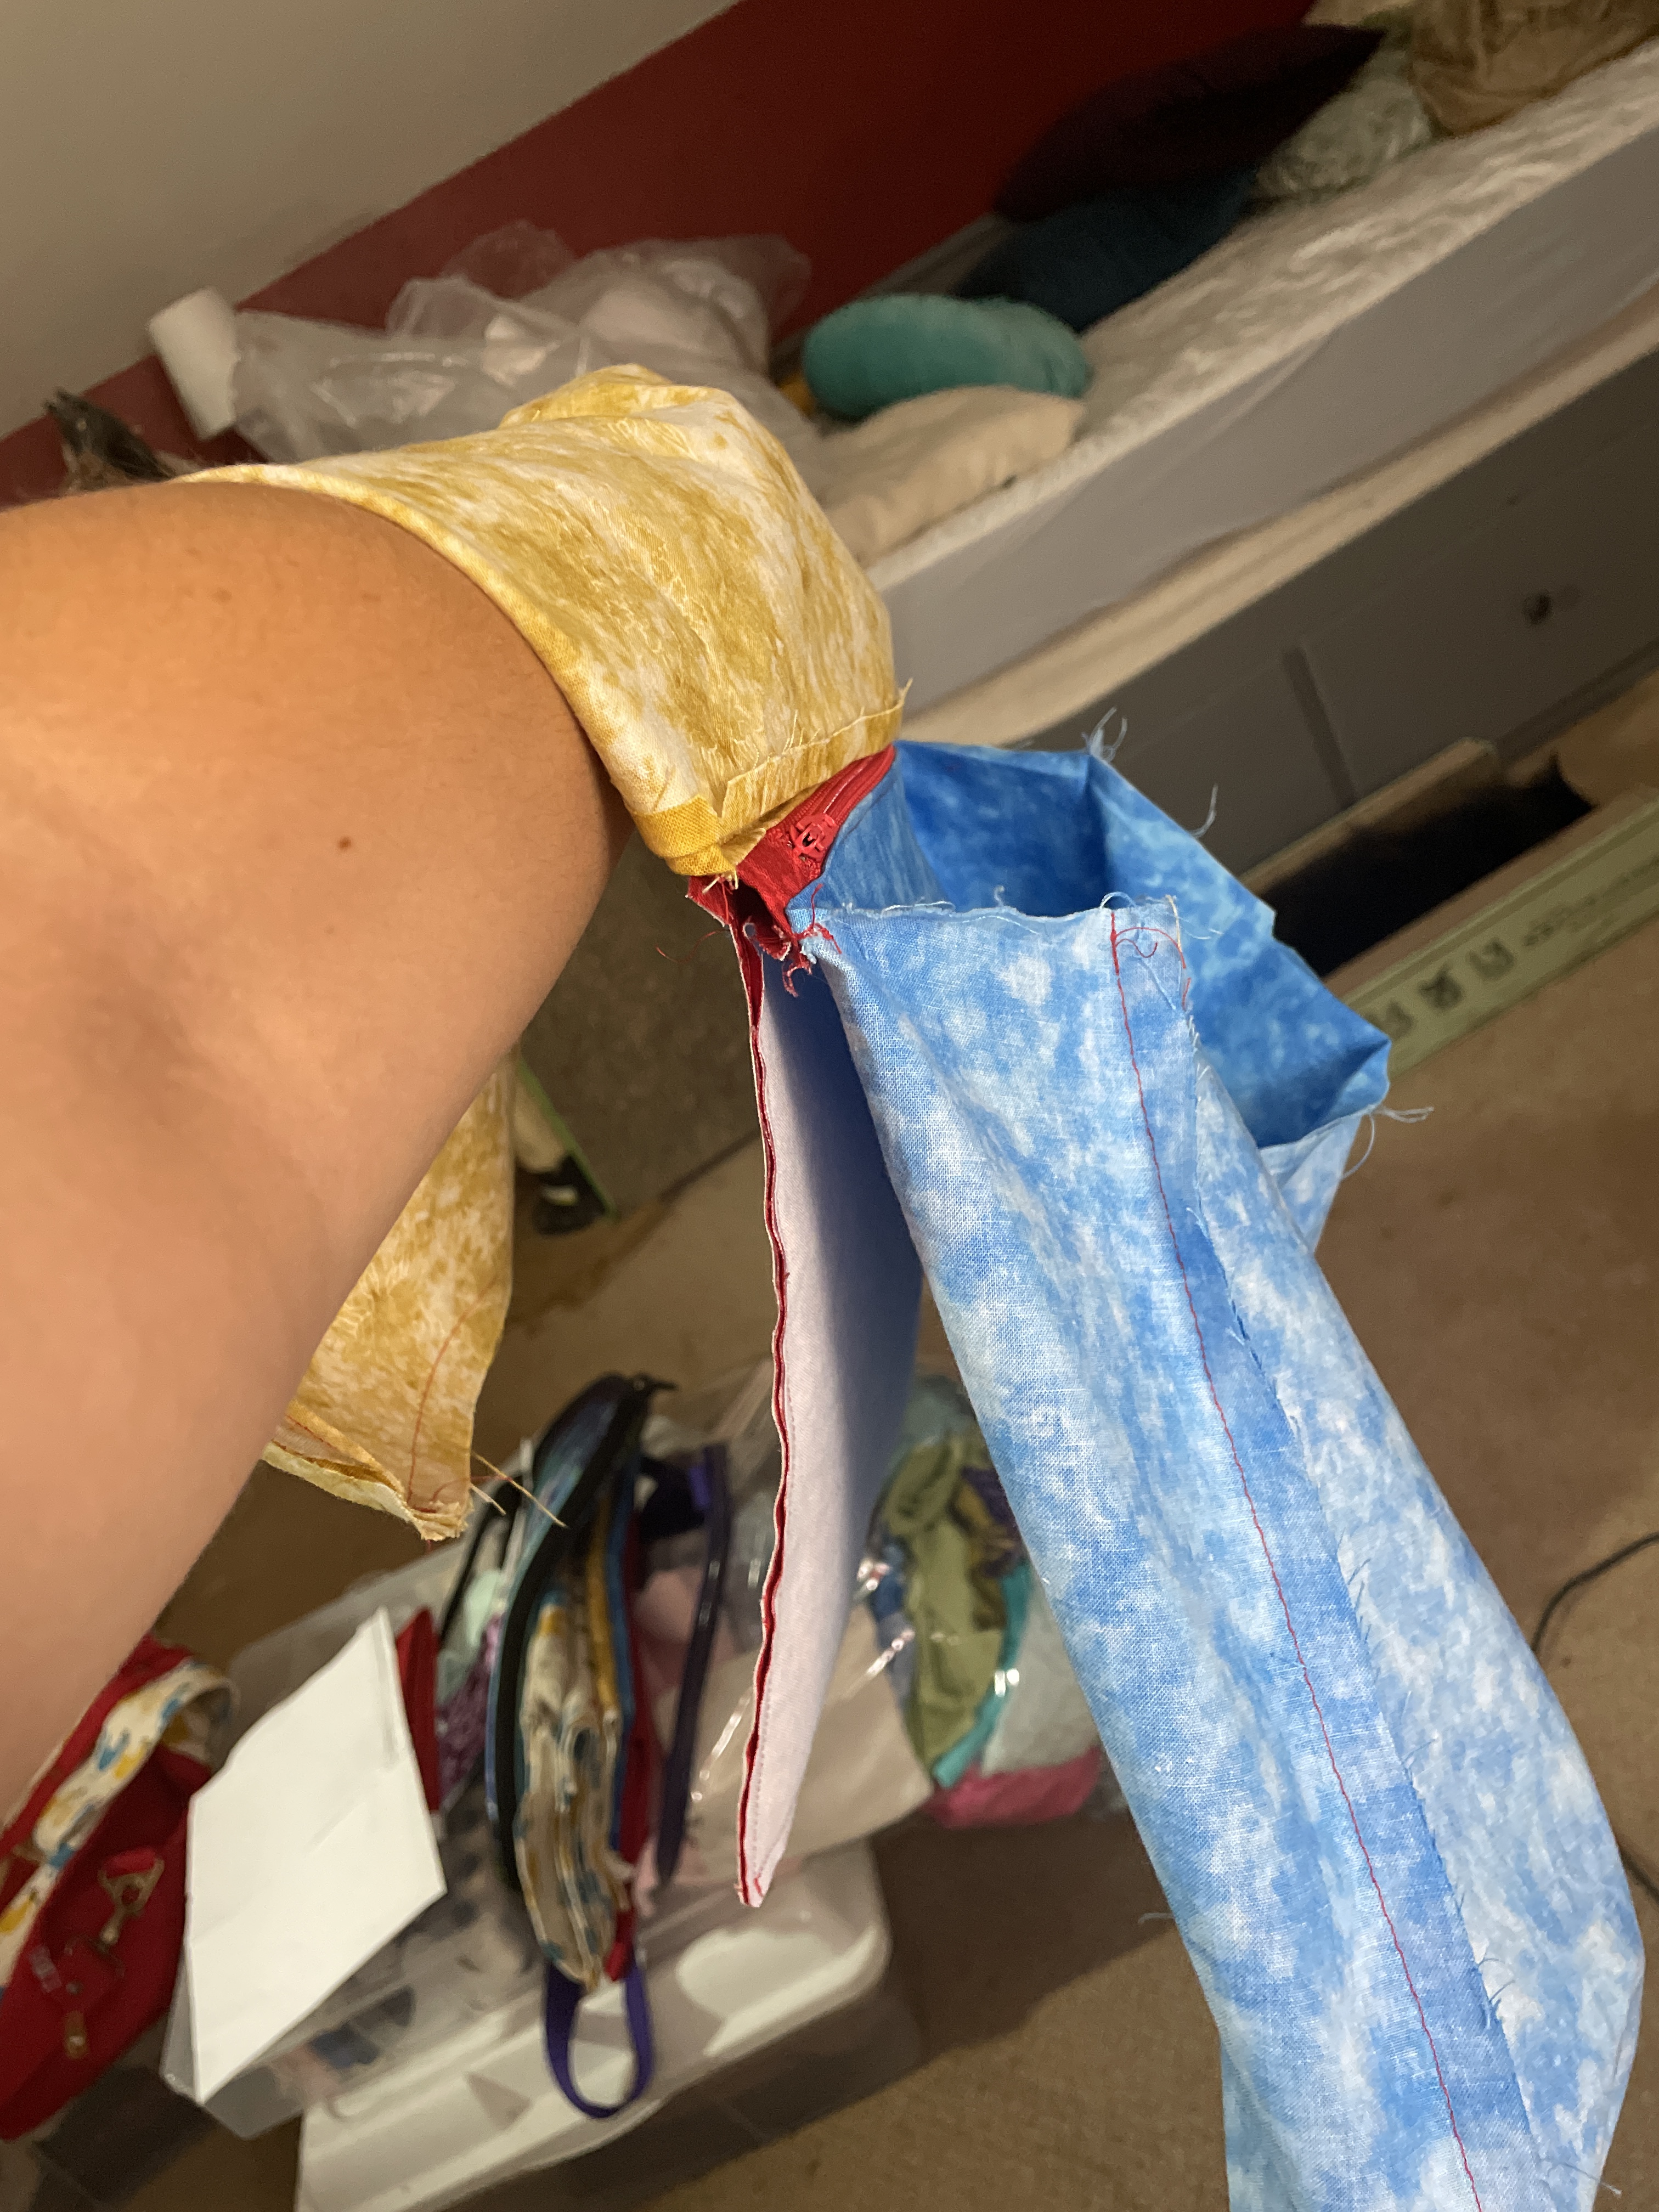
With the exterior of the bag now assembled, I turn my attention to the interior: two large pockets with a smaller, zippered pocket between them. I have a rather sizeable distrust of my abilities around sewing zippers, but needs must. I begin with assembling the larger pockets: one blue, one yellow. I choose the blue to attach the zipper first for the small, red pocket (this construction makes my head hurt, but it does work in the end, promise) and manage not to bungle it. Then, according to the instructions, I line up the cut outs on the small pocket pattern pieces with the ends of the zipper.

But they don’t line up. *cue muffled screaming*
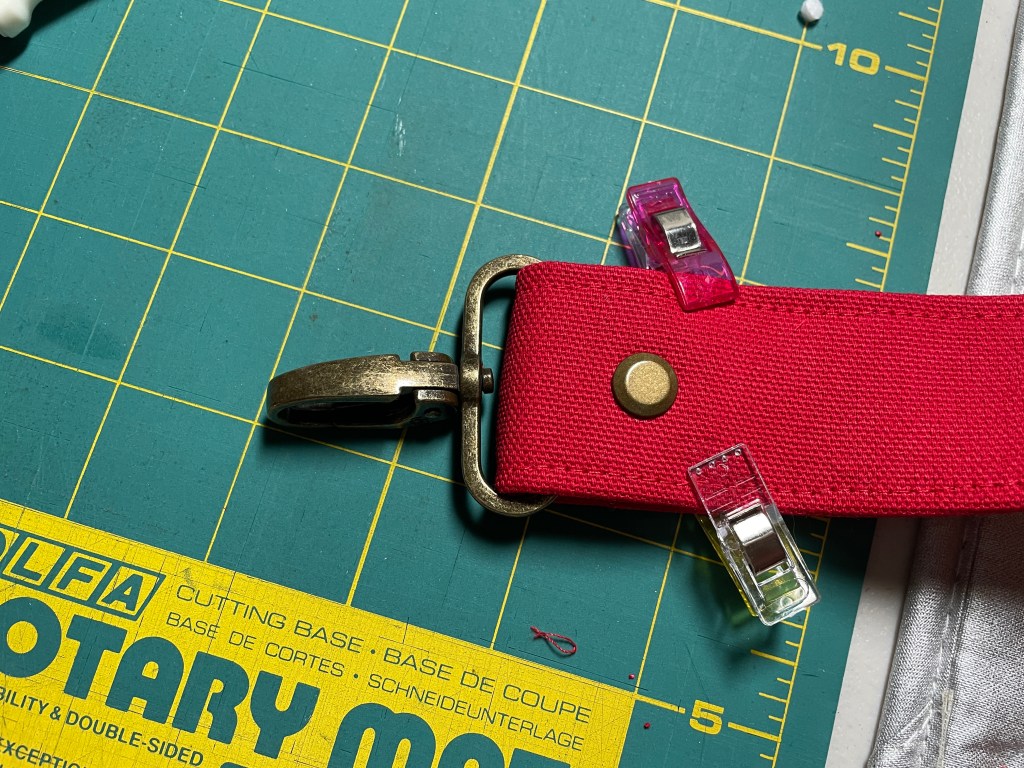
Mad at however this happened (I honestly am not sure how – the notches in the large pocket were taken from the pattern piece itself and the small pocket piece was increased by 50% just like the rest), I decide to put the whole shebang in the corner to think about what it’s done and work on the shoulder strap instead. It’s a good choice on my part; more rivets are “necessary” and I get to punch holes in things.
Once the strap is complete, I am in a better mood and only frown at the pocket pieces instead of glaring daggers. I have options on how to proceed: either cut out new small pocket panels, or rip the seam holding the zipper to the blue pocket and readjust its length and position. I happen to like my seam ripper and loathe, loathe, I tell you, digging out pattern pieces from the envelope after I’ve neatly folded and stored them, so I take off the zipper and start over. Added benefit: no fabric waste!
With this snafu corrected, I sew the rest of the small pocket and manage to attach the yellow large pocket without fuss. I even topstitch each side of the zipper teeth without having to rip it out once! So smug.


Now to get this trio into the bag exterior, muahaha. Oh wait, just kidding – I want to put little purse tootsies on the bottom!
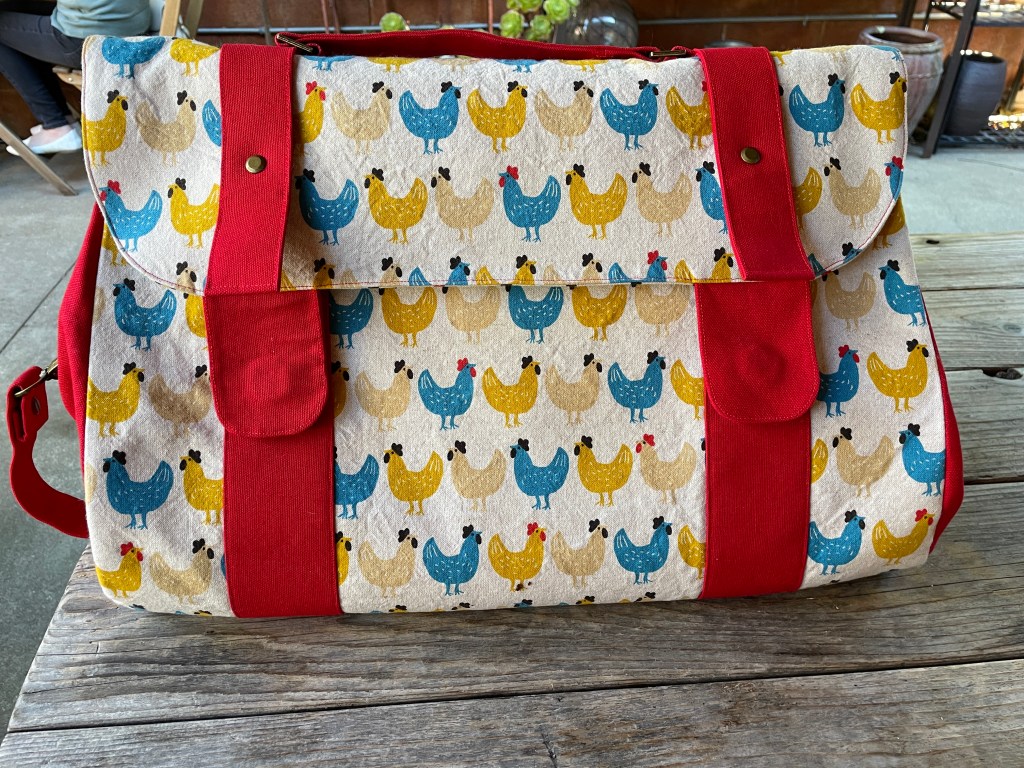
Upon looking at the width of the bag (a smidge over 18 inches), I realize that if I don’t want a floppy, U-shaped sack of a chicken bag, I will need to reinforce the bottom. Some research, and digging at a local craft supply store, results in some lightweight but sturdy plastic that I cut to the dimensions required. I reach for my lovely so-much-more-than-leather punch, and cut four neat little holes in both the canvas bottom and the plastic insert. Given I can’t actually get all that bag material bunched up in the tiny space behind the punch bit, my mallet and an old cutting board get some air time. It all works marvelously.
Until I put the stem of my screw-on purse feet through the plastic insert and they baaaaarely peek out of the other side. Not deterred, I screw on the other side and just keep twisting and twisting until it cannot be twisted any longer – et voila, the wonder of plastic: it squished and deformed slightly under the pressure but did not crack! I now have plenty of stem to get through all layers.
However, I notice that even though I did my best to pull the canvas snug over the plastic insert, the sheer distance between the feet means there is still a tiny bit of sag. Not to worry – my love of rivets hasn’t failed me yet! A few taps from my mallet through the whole bottom kit and I have two lovely rivets holding up the middle of the bottom panel. And you thought I was smug about the zipper.


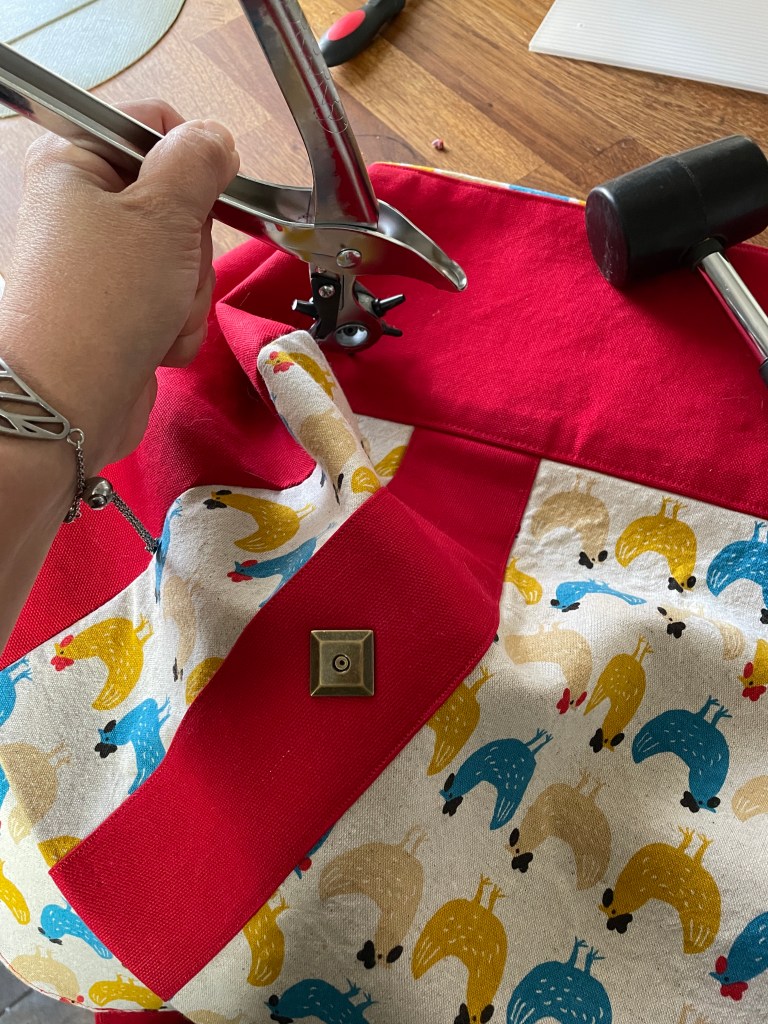
I am so ready to start the process of attaching the interior to the exterior on this bag, but then I get struck by inspiration: clasps to keep the side tops together! I have these on a large purse of similar construction and they are so very handy in keeping the bag from losing its shape. I immediately get to work, using my now-adept skills to place and install the magnetic claps on each side of the bag. Phew. Can I please start on the final assembly now, brain? Thanks.

When the instructions direct me to maneuver the entirety of the bag through my sewing machine to attach the lining to the exterior, I blanch. There is no way I’m fighting both bag and machine to get this beast assembled – I’ve been down that road. Hand-sewing it will have to be, and I have just the technique to do the job: sashiko stitch.
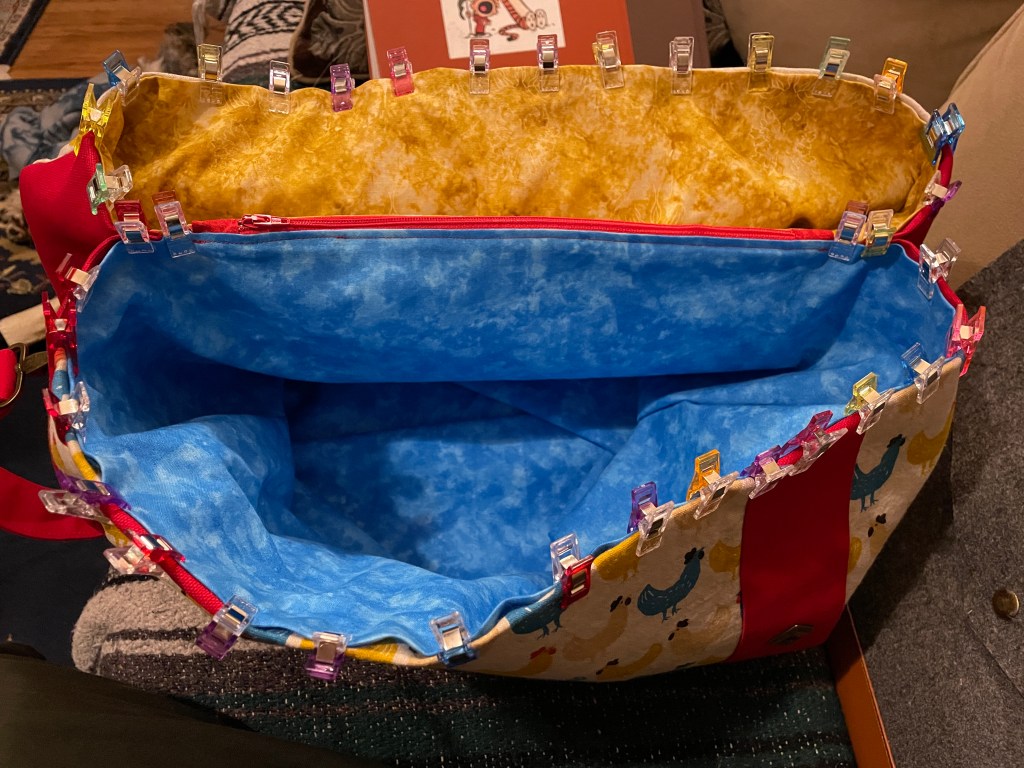
Sashiko is a Japanese quilting technique (I will go into it more in a later post) and between the straightforward running stitch, thicker thread, and stupid sharp needle, it fits my needs in this instance rather perfectly. Also, I could leverage another awesome tool: a palm thimble. The design of this thimble allows you to use the force of your entire hand to push a needle through, say, eight combined layers of canvas, interfacing, and quilting cotton, with relative ease. In a surprisingly short period of time, I complete two lines of blue sashiko stitches around the entire perimeter, plus some blanket stitches on edges near the zippered pocket for extra reinforcement.


I put away my needle and thimble, and stare at this bag in …shock. It’s done. I wasn’t sure it would ever actually be finished, but it is. And it’s glorious.

Wow. Such a professional job. I was struck with the similarities of sewing to writing. There are lots of way to do it, but you either have to have your own work arounds or take it step by step or to quote Anne Lammot…bird by bird. Good job.
LikeLiked by 1 person
geolear = Jana Lear
LikeLike