
A dear friend of mine texted me one day, and asked me, “Hey there, do you know how to re-cover lampshades?”
I didn’t. I had never done it before. Now, if you have read my prior posts, you know what’s coming – I couldn’t just say no. So I respond with, “I don’t, but I can learn!” And so the journey of The Lampshades began.
The lampshades in question fit a set of lamps that had belonged to my friend’s grandmother and, as she so aptly put it, Had Nostalgic Value. The bases were sculptures of white elephants, with green and russet accoutrement. The shades were made of two types of silk: a textured shantung for the interior and slubbed, dupioni style for the exterior; plus gray-green velvet ribbon and russet cord trimming the top and bottom borders.

Fun fact about silk, learned from my boss and friend Carol over at The Ardent Thread: when exposed to light and heat, silk doesn’t just wear out – it shatters. And shattered is just how I would describe the state of the silk on these shades. After the many years of service they had rendered in close proximity to a bright, toasty lightbulb, the fibers were so brittle that even light handling would trigger new splits in the silk. Okay, so we won’t be covering them in kind, I guess!
But what to use? This is where my stash of odd fabrics comes in handy! I have hoarded collected a variety of textiles in all sorts of patterns and textures over the years. After asking a few clarifying questions around the look we were aiming for (quirky, but still a similar color), I find a winner:
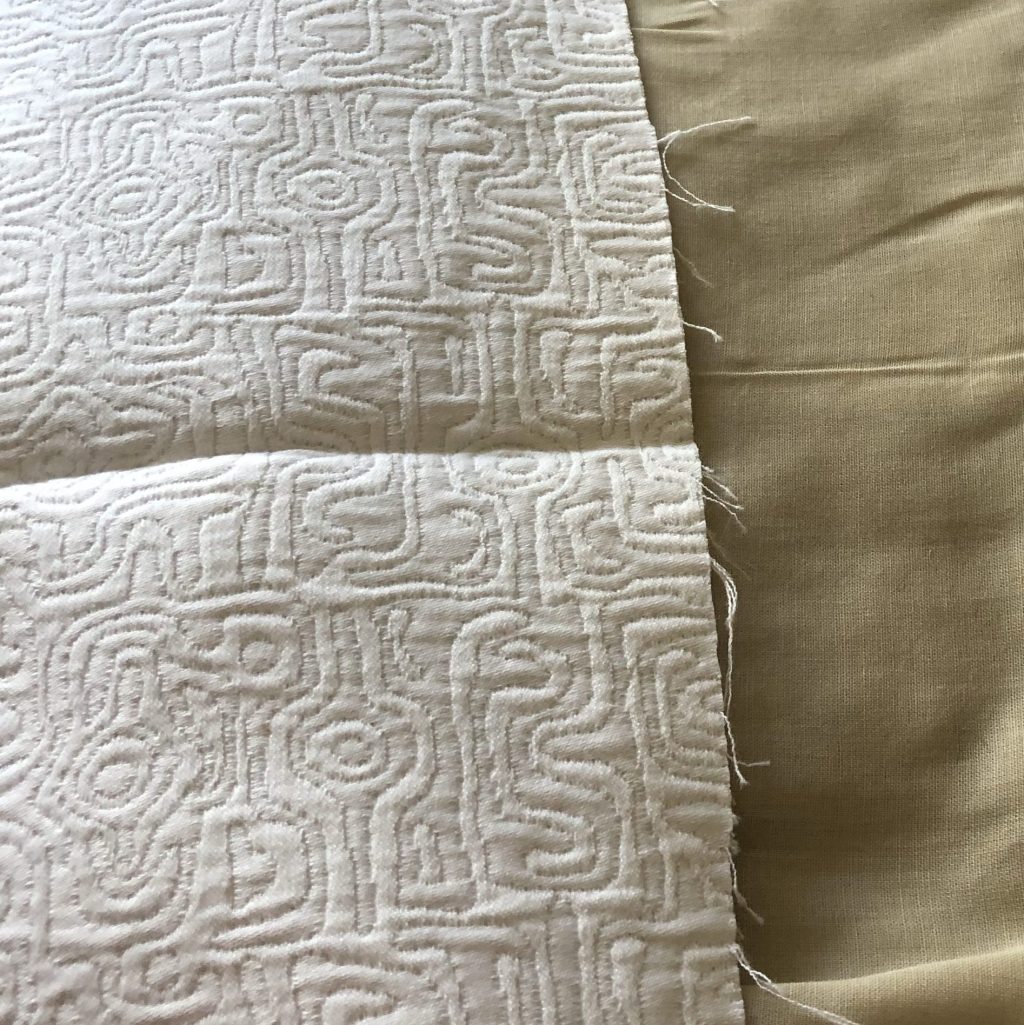
The fabric is white with a patterned texture woven into it, and as far as I can tell, is mostly cotton. No shattering fibers here! The pattern is unusual but not overly busy or fussy. Similar to the original, we decide to use a plain, taupe cotton for the interior lining. Materials are all set, now I just have to figure out the how.
A few short YouTube videos later, I have the vocabulary to describe the lampshades in my charge: they have a metal frame wrapped with cotton tapes, to which the fabric is sewn to after being stretched to fit. Okay. Seems straightforward… but just to be safe, I take about 74843902 pictures while disassembling the first one to document its construction technique. I don’t trust myself to remember and what else is the camera on my phone for, anyway?! (Answer: this and taking videos of my cats children for posterity).
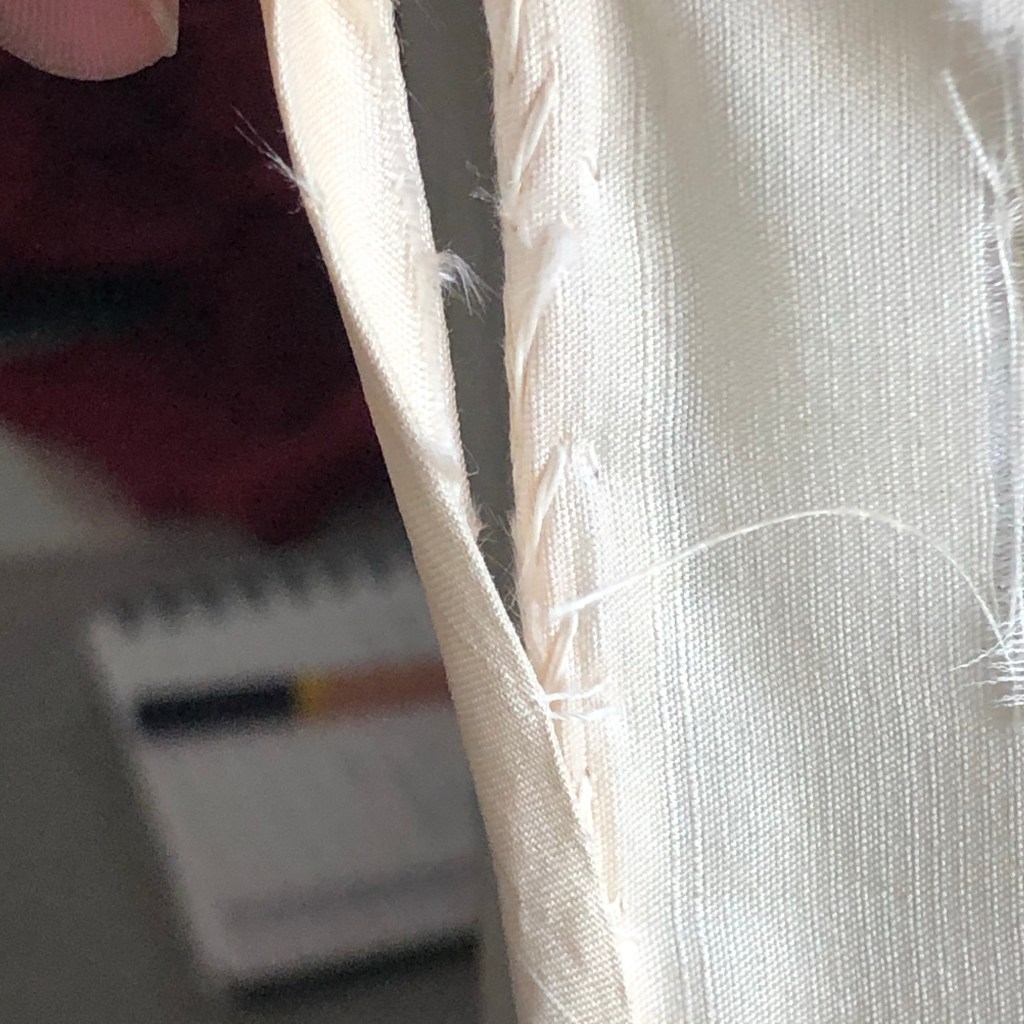
First thing to come off: trim. To my surprise, this isn’t so much sewn on as glued on! (I would learn later as to why, but the hard way – of course). This was a boon, since the glue for the russet cord had somewhat deteriorated and that meant I could remove it with little to no damage. I kept the lengths just in case I could use them again. The other surprise was that the fuzzy ribbon under the russet cord wasn’t originally gray-green, but VERY green. Why, of course! It’s the same green as what is on the elephants! Alas, due to both the way it was adhered to the original lampshade and how terribly faded it was, I couldn’t save this trim for later use. You win some, you lose some, but now I had more information about what to use for the final product.

Next up: taking off the “finishing” strips, or at least that’s the best thing I can think to call them; these are strips of bias tape that were sewn/glued over all of the exterior seams. I do this removal carefully, especially for the upright bars of the lampshade frame. I need to preserve the material underneath to understand how the fabric has been stretched over the frame.
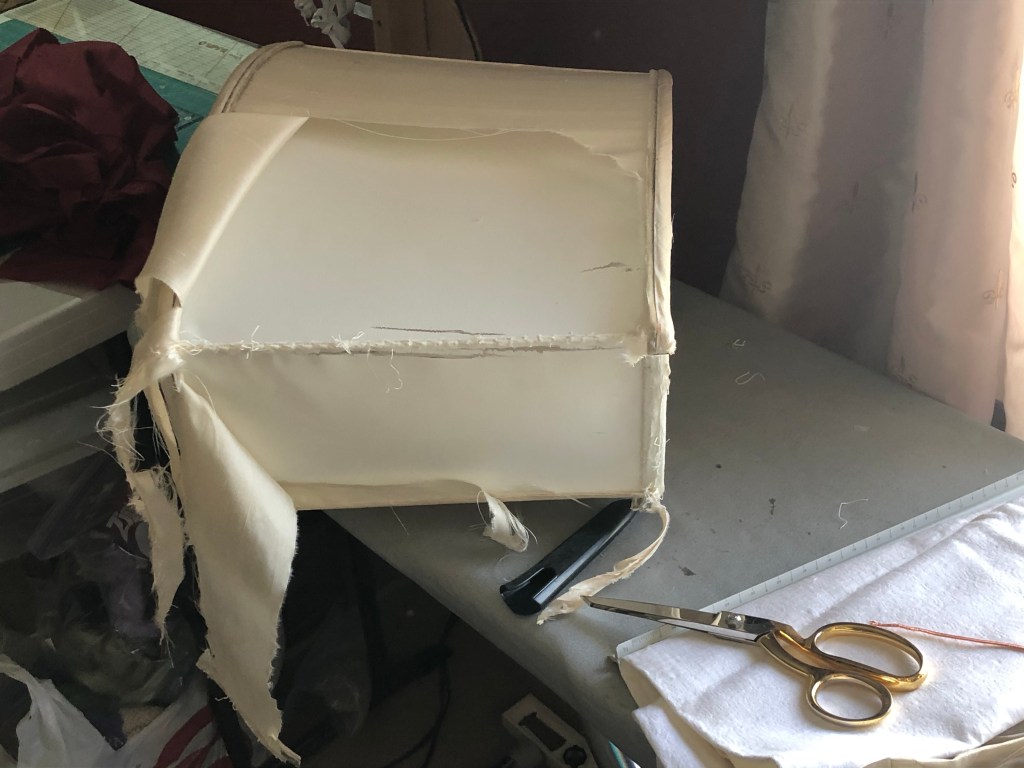
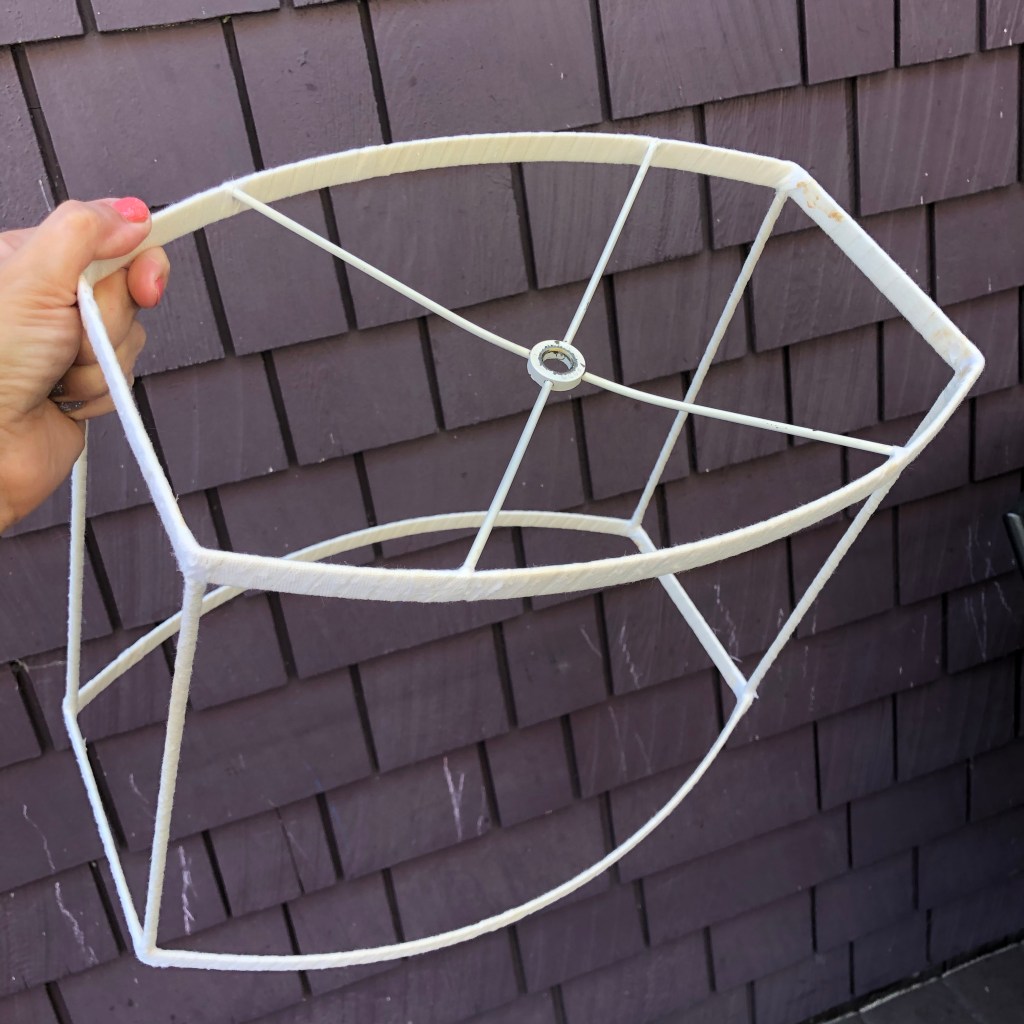
Finally, it is time to take off the fabric itself! I take off the exterior first. Once I get the initial edge loosened from its glue, the rest is just snipping the whip stitches holding it to the tapes. I am careful to avoid damaging the tapes – they look in decent condition so far, and the less I have to replace, the better. Once that’s done, the interior is pretty straightforward. It’s sewn directly to the tapes, and layered carefully in the corners. Again, after taking 542243 photos, I carefully snip the whip stitches, even the tiny ones on the vertical bars, until I have freed all of the fabric and removed all the hanging threads.
Ta-da! A naked lampshade frame! That only took me… three months.
…Oh dear.

2 thoughts on “Getting Shady, Part I”